Kitchen note 004 · Cookware
Choose a roasting pan that fits the whole holiday workflow
A pan has to clear the closed oven door, carry the food without blocking circulation, give mittened hands a controlled grip, survive cleanup, and fit somewhere after the meal.
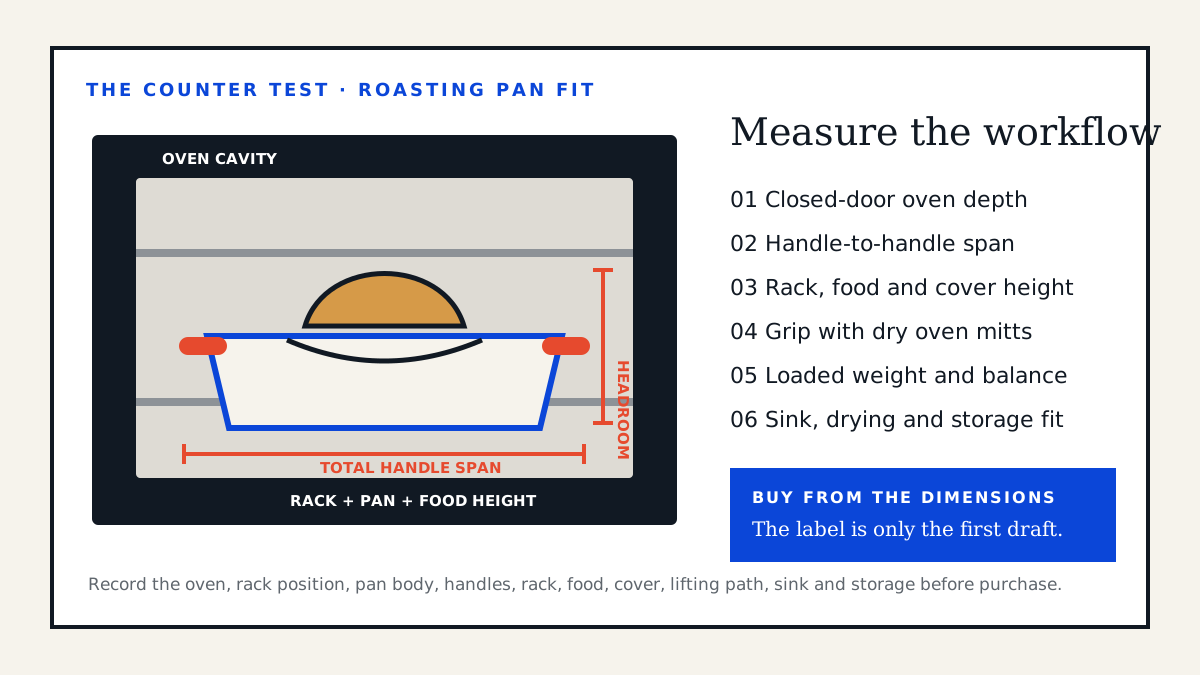
Roasting-pan listings often lead with one body dimension and a maximum bird weight. Neither number describes the object that must move through your kitchen. Handles can add several inches. A rack raises the food. A domed lid can consume the shelf above. The oven door may intrude when closed. A wide pan can fit the cavity and still crowd the walls enough to interfere with heat circulation.
USDA warns that a turkey or pan may be too large for an oven and block heat circulation. Its basic turkey method uses a flat wire rack in a shallow roasting pan about 2 to 2½ inches deep at an oven temperature no lower than 325°F. That guidance is a cooking-safety baseline, not a promise that any pan described as “large” fits your appliance or your particular food.
Seasonal reader questions show the same gap: Will the handles clear? Will a bird on the rack hit the upper element? Can a shallow pan hold the drippings? Can the cook lift the full load without tipping it? The useful buying brief begins with those questions rather than a brand ranking.
1. Choose the method before the vessel
Write down the dish, cooking method, food shape, usual quantity, recipe temperature, whether a rack is required, whether the food will be covered, and whether the pan must move to a cooktop for sauce. A traditional whole turkey, a spatchcocked bird, a standing rib roast, a braise, roasted vegetables, and baked pasta ask different things of the pan.
Height and access
Account for the bird, rack, thermometer placement, foil or cover, and space needed to check the three USDA temperature locations.
Usable floor area
A spatchcocked bird or broad roast may need more flat area and less wall height than an upright bird.
Cover and liquid
Verify lid fit, oven rating, liquid capacity, and a stable path from counter to oven.
Cooktop compatibility
Confirm that the exact pan—not just the material family—is approved for the specific gas, coil, radiant, or induction surface.
Do not buy a pan to compensate for an unsafe cooking plan. Follow the recipe, oven manual, pan instructions, and current food-safety guidance. USDA recommends cooking stuffing outside the bird for more even cooking and using a food thermometer. The finished turkey must reach 165°F in the thickest part of the breast, innermost thigh, and innermost wing.
2. Measure the oven as a closed system
Remove the oven racks only as the appliance manual allows, then choose the rack position the recipe and manual call for. Measure the usable rack width, front-to-back depth with the door closed, and vertical space to the shelf or element above. Keep required clearance from walls, doors, elements, convection openings, temperature sensors, and other bakeware. Do not infer a clearance from the cavity’s metal shell; use the oven manual.
- Total handle span.
Record the maximum outside width or length across handles, not just the interior or rim measurement. Upright handles may save horizontal space but add height.
- Pan-body dimensions.
Separate inside floor area, inside rim, outside body, and total span. Curved walls can make the bottom much smaller than the published top dimension.
- Rack height.
Add the pan floor, included rack, food, probe, and any cover. A high V-rack can turn a pan that fits empty into one that crowds the upper oven.
- Door sweep.
Check the space the closed door and handle assembly require. A pan that sits safely on an open rack may contact the door after sliding inward.
- Air path.
Leave the clearances required by the oven and recipe. USDA’s warning about blocked heat circulation makes “technically inside” an inadequate fit test.
- Second-dish plan.
If another casserole must share the oven, map both footprints, heights, temperatures, and timing before purchase.
Make a cardboard outline of the pan’s full external dimensions, including handles. Place it on the cool oven rack and close the door. Cardboard never goes into a hot or operating oven; it is only a cold sizing template. For height, use a paper scale or ruler while the appliance is off and cool.
3. Size the pan from the food outward
The food needs to sit within the usable interior without touching walls in a way the recipe or pan maker prohibits. The rack must be stable, and drippings need enough contained volume. Yet oversizing has costs: more oven crowding, more storage, a longer lever in the hands, and a larger surface over which drippings can spread and scorch.
A seller’s “fits up to X pounds” claim is incomplete without the food’s shape and the included rack. Two turkeys with the same weight can differ in width and height. Ask for the pan’s inside floor, inside rim, outside body, total handle span, rack footprint, and rack height. If those dimensions are absent, the size claim is not ready for a decision.
| Measurement | Where to measure | Why it changes the fit |
|---|---|---|
| Inside floor | Flat base available below wall curves | Determines rack stability and actual food support |
| Inside rim | Opening at the top edge | Determines food and utensil access |
| Wall height | Interior floor to rim | Affects containment, reach, and exposure to oven heat |
| Total span | Farthest handle to handle | Determines oven, sink, cabinet, and doorway clearance |
| Rack rise | Pan floor to food-support surface | Determines headroom and probe access |
| Loaded height | Pan base to highest food, probe, foil, or lid point | Determines shelf and element clearance |
4. Test the lift before trusting the handles
A pan that weighs six pounds empty may carry a much heavier and less balanced load after food, vegetables, liquid, rack, and lid are added. Published capacity does not tell you whether the cook can control it. Estimate the complete loaded weight, then practice with a cool substitute load before the event.
Use the dry oven mitts or gloves you actually cook with. Confirm that the handle opening accepts them without crushing fingers against the hot wall. Check whether the wrists stay neutral, whether both handles can be reached before the rack is pulled too far, and whether the cook can move from oven to landing area without turning around, stepping over a mat, or clearing decorations.
The landing zone must be ready before the oven opens. It needs a heat-safe surface larger than the pan’s complete footprint. Children, pets, chairs, cords, towels, and guests should be out of the route. If the safe load exceeds the cook’s ability, choose a smaller cooking format, divide the food, use a different vessel, or assign a capable helper. Do not discover the limit with hot fat in motion.
Inspect how handles attach. Rivets, welds, folded sheet metal, cast loops, and removable grips each have different care and inspection needs. Reject looseness, sharp edges, cracks, deformation, corrosion, or a handle that traps residue where it cannot be cleaned.
5. Compare materials through the tasks
| Construction | Verify | Plan for |
|---|---|---|
| Stainless steel, single or clad | Exact layers, oven limit, cooktop approval, rack material, handle construction | Empty weight, browning behavior, stuck-on drippings, polishing expectations |
| Aluminum, uncoated or finished | Gauge, finish, oven limit, food-contact directions, cooktop prohibition or approval | Denting, reactivity guidance, discoloration, rigid support and storage |
| Enameled metal | Base metal, chip policy, thermal limits, utensil and cleaning guidance | Edge inspection, impact damage, weight and replacement condition |
| Coated nonstick | Coating identity, maximum temperature, broiler rule, utensil rule, rack contact, replacement signs | Scratching, abrasion, reduced high-heat flexibility and finite coating life |
| Glass or ceramic | Exact oven use, preheat and thermal-shock rules, broiler or stovetop prohibition | Impact, weight, hot-surface transitions and model-specific limits |
| Disposable foil | Package directions, dimensions, weight limit, support and disposal guidance | Flexing, puncture, sharp rims, one-time workflow and a rigid landing plan |
“Heavy duty,” “commercial,” and “premium” are marketing terms until the maker provides construction, weight, dimensions, temperature limits, and use instructions. Likewise, a material name does not establish cooktop compatibility. Stainless formulations vary, multilayer pans can combine materials, and a magnetic base may be added to otherwise nonmagnetic cookware.
If stovetop gravy matters, verify the exact pan on the exact surface. ENERGY STAR explains that induction requires compatible magnetic cookware and suggests a magnet as a quick compatibility check, while also noting that an induction logo may appear on packaging. A magnet sticking is a useful screening step; it does not establish the pan’s oven limit, flatness, burner-size match, or manufacturer approval for induction.
Large pans can bridge multiple burners or extend beyond one element. Do this only when both the cookware and appliance instructions permit it. Uneven heating, warped bases, oversized flame, and hot handles can make a convenient idea unsafe.
6. Treat the rack as separate equipment
A rack changes height, stability, contact points, cleaning, and lifting. Check whether it locks into a defined position or slides on the pan floor. Place a cool surrogate load on it and press lightly from several directions. The rack should not tip, collapse, or rotate under normal handling.
Compare a flat rack with a V- or U-shaped rack by the foods you cook. A shaped rack can cradle a whole bird; a flat rack may support varied roasts and flatter foods. Check the spacing and direction of wires, probe access, lifting handles, feet, coating, maximum load, dishwasher guidance, and whether replacement racks are available.
Do not assume a rack from another pan is compatible because it fits inside. Its feet may concentrate load, scratch a coating, slide, or raise the food beyond safe clearance. Use combinations approved by their manufacturers.
7. Keep thermometer access in the buying brief
A pan and rack should allow a thermometer to reach the correct part of the food without forcing the hand against a hot wall or routing a cable across an element or door seal. USDA says whole poultry should be checked in three places: the innermost thigh, innermost wing, and thickest breast. The center of stuffing must also reach 165°F.
If using an oven-safe leave-in thermometer, follow its placement and cable instructions plus the oven and pan manuals. For spot checks, plan how far the rack must move, where the hot pan lands if repositioning is required, and how the probe will be cleaned between readings. Our food-thermometer buying guide explains sensing areas, probe geometry, accuracy claims, calibration support, and cleaning limits.
8. Buy for sink, cleanup, drying, and storage
Measure the sink basin, faucet height, dishwasher rack, drying area, and cabinet. A pan may fit the oven and fail every cleanup step. If it cannot lie flat in the sink, decide how the entire interior, exterior, handles, seams, corners, and rack will be washed without spreading grease or striking the faucet.
Read the exact care instructions before buying. “Dishwasher safe” does not promise that the pan fits your machine, that the rack shares the same guidance, or that finishes will look unchanged. Check allowed detergents, scrubbers, soaking, stain removers, utensils, and procedures for cooked-on drippings. Coated pieces need clear replacement criteria when the surface chips, peels, blisters, or wears.
Dry the pan and rack fully before nesting. If another pan sits inside, use only a protector that the maker permits and that stays dry. Store the rack so its feet and wires cannot scratch the pan. A seasonal pan should remain reachable without lifting it over the head while standing on a chair.
- Record the pan body, rack, lid, and accessories as separate items.
- Keep the use-and-care guide with the measured oven brief.
- Inspect handles, rack feet, coating, enamel, rim, and base before each major use.
- Retire a component that is loose, cracked, chipped beyond maker limits, badly warped, or no longer cleanable.
- Never line the oven floor or block vents unless the appliance manual explicitly allows it.
A seven-line roasting-pan specification
Before comparing products, write the maximum total handle span, maximum closed-door depth, maximum loaded height for the chosen rack position, minimum usable floor, target loaded weight, required cooktop compatibility, and maximum storage envelope. Add the food, method, rack type, cover, thermometer access, and cleaning path.
That specification may reveal that existing equipment already works. USDA calls for a rack in a shallow roasting pan for its basic turkey method; it does not require a premium branded roaster. A compatible rimmed vessel and rack may meet the method when their manufacturers approve the use and the complete setup fits safely. Buying fewer tools is a valid result of the test.
Culinary Hub Store does not currently list branded roasting pans, prices, inventory, availability, or checkout. Those details will remain disabled until authorized sourcing, exact specifications, commercial terms, fulfillment, returns, and warranties are documented.